Creating a GO GUI with Alpine.js and Webview
Thomas Schühly’s server-side rendering journey started as a developer trying to make life easier while developing his first bootstrapped product in his free time. Creating Spring ViewComponent enabled him to be the youngest Speaker at the largest European Spring conference and build awesome software full-time with his open-source library at alanda.io. He regularly talks at Java User Groups about htmx and server-side rendering with Spring while contributing to the open-source community. PhotoQuest
There are a lot of options for building a GUI for Go applications. Coming from the web development world building the front end with HTML seems like a no-brainer.
Webview
Webview is a tiny cross-platform library for C/C++/Golang to build modern cross-platform GUIs. The goal of the project is to create a common HTML5 UI abstraction layer for the most widely used platforms.
To start using Webview you need to install Webview: go get github.com/webview/webview
On Windows, you need to have these two dlls in the project root folder.
It supports two-way JavaScript bindings (to call JavaScript from C/C++/Go and to call C/C++/Go from JavaScript). But writing pure JavaScript code for the interactivity is awful.
Alpine.js to the rescue
"Alpine.js is a rugged, minimal tool for composing behavior directly in your markup." It fits perfectly for our use case.
You can load Alpine inline or from a file. The newest version is available at unpkg.com/alpinejs
func loadAlpine() string {
    return "paste alpine.js source here"
}
First, you must initialize Webview.
func main() {
    webView := webview.New(true)
    defer webView.Destroy()

    webView.SetSize(600, 600, webview.HintNone)
    webView.Init(loadAlpine())
To execute go code with Alpine we need to call webView.bind("functionName").
webView.Bind("extractSubDirectories", func(sourceFolder string) string {
  folderUrls = extractSubDirectories(sourceFolder)
    tmpl := template.Must(template.New("html").Parse(
      // language=GoTemplate
    `<div>
      {{range $vendor, $folderDetailsArray := .}}
        <div>
          <h3>Vendor: {{$vendor}}</h2>
        {{range $folderDetails := $folderDetailsArray}}
          <ul>
            <li>{{ .Path }} filecount:: {{ .FileCount }}</li>
          </ul>
        {{end}}
        </div>
      {{end}}
     </div>`))
  var html bytes.Buffer
  err := tmpl.Execute(&html, folderUrls)
  if err != nil {
    logger.WritePrint("ERROR: " + err.Error())
  }
  return html.String()
})
To create your first page you call webView.Navigate() and supply it with your HTML. Then call webView.Run()
webView.Navigate(`data:text/html` + `<!doctype html>
<html lang="de" x-data="{ pathInput: '', table : ''}">
<body style="padding: 2rem">
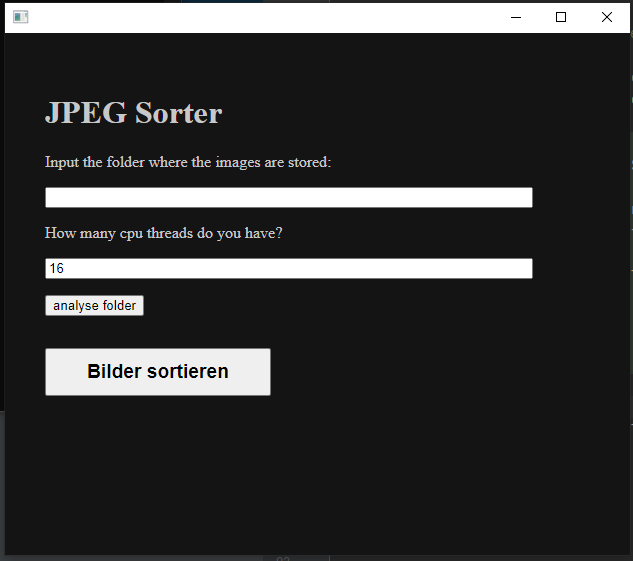
<h1>JPEG Sorter</h1>
<p>Input the folder where the images are stored</p>
<input type="text" x-model="pathInput"/>
<button @click="table = ''; table = await extractSubDirectories(pathInput);">analyse folder</button>
<div x-html=table></div>
</body>
</html>`)
webView.Run()
Alpine.js
As you can see there are quite a lot of non-standard html attributes.
This is the magic of alpine.js. You can create local alpine data variables in the scope of the element:
<html lang="de" x-data="{ pathInput: '', table : ''}">
You can bind input data to the local variables with x-model
<input type="text" x-model="pathInput"/>
But the coolest part comes now. With an @click alpine attribute, we can call our go functions from the HTML. The extractSubDirectories() function we bound earlier in this example.
<button @click="table = await extractSubDirectories(pathInput);">
  analyse folder
</button>
With x-html we can bind the returned HTML from the go function into our GUI.
<div x-html=table></div>
These are the basic steps to get Webview and alpine.js working with Go.
GUI Example
If you want to learn more about HTMX + Spring Boot check out my series Web development without the JavaScript headache with Spring + HTMX.
My side business PhotoQuest is also built with HTMX + JTE