
The best way to build Spring Boot applications with htmx
Why should you even care?
Spring Boot developers usually build JSON APIs that get client-side rendered on the browser.
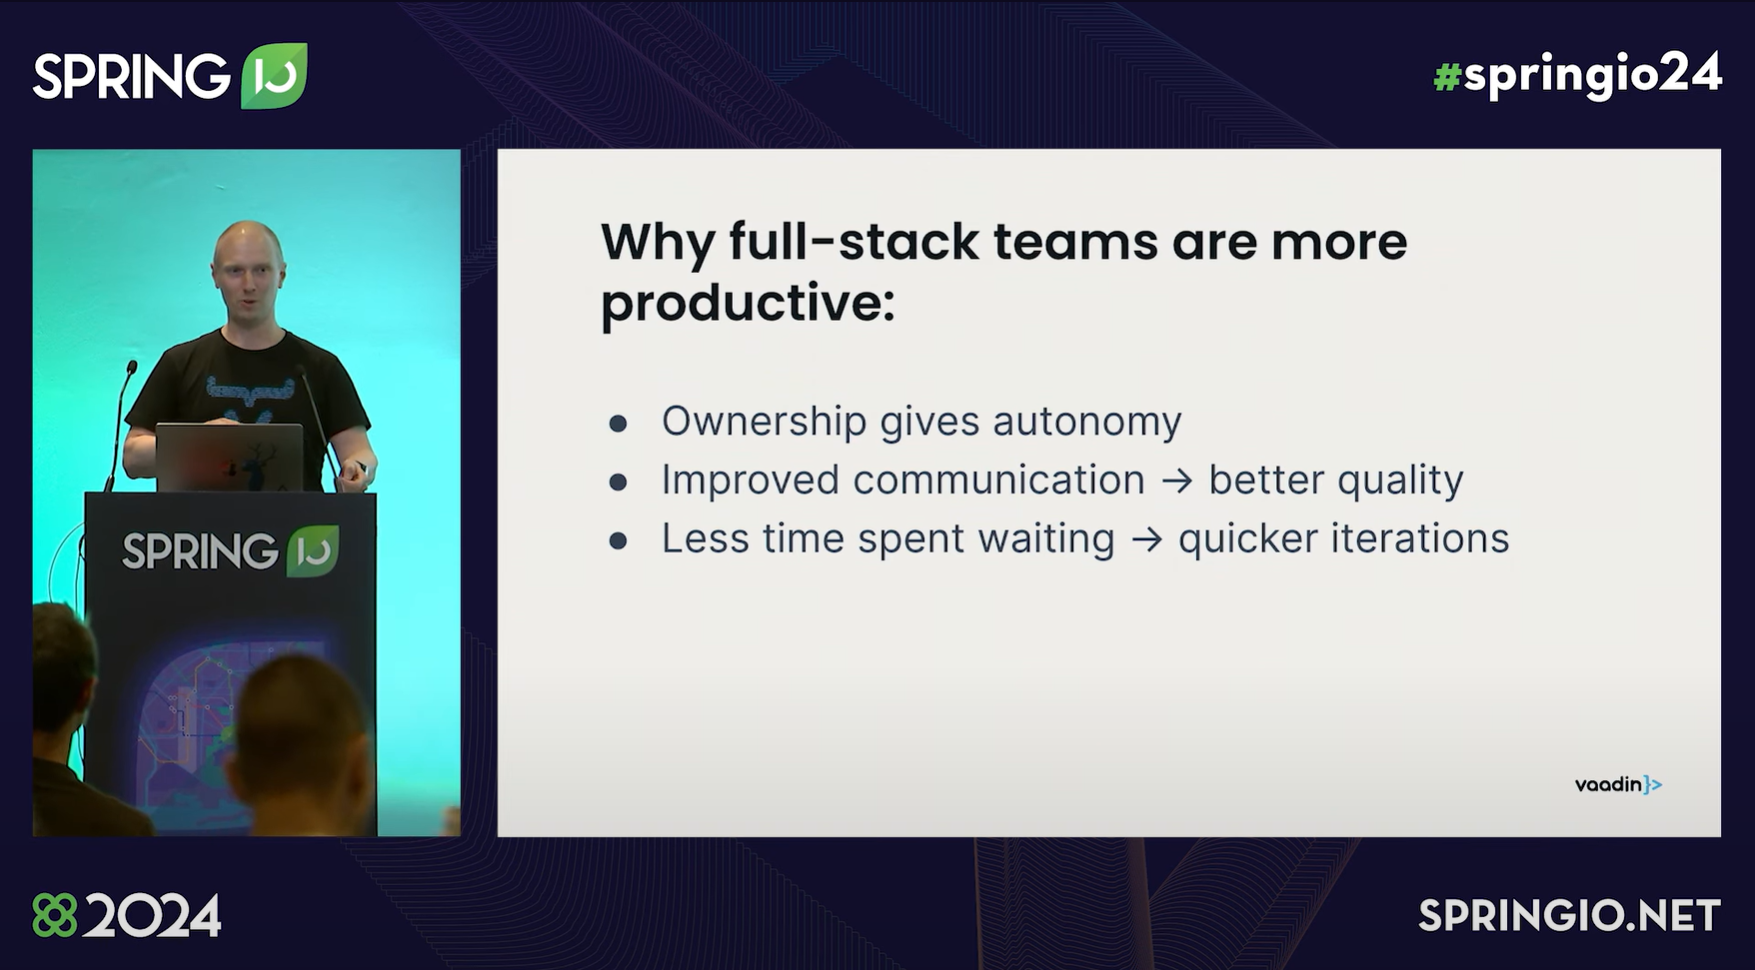
Marcus Hellberg tells us why we should aim to build a full-stack team:
But with the rise in complexity in modern JavaScript frameworks and the constant change it's hard to keep up!
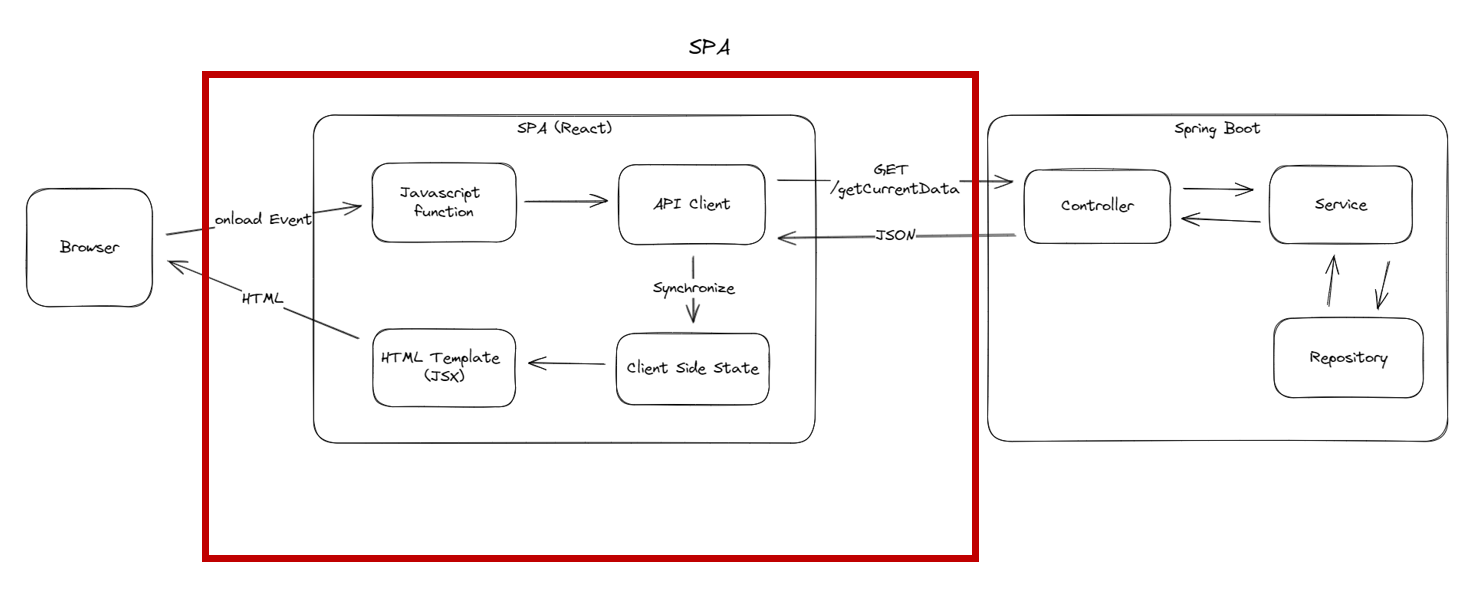
The browser can only display HTML! Why send JSON to the client that needs to be rendered to HTML? We can just remove this unnecessary complexity!
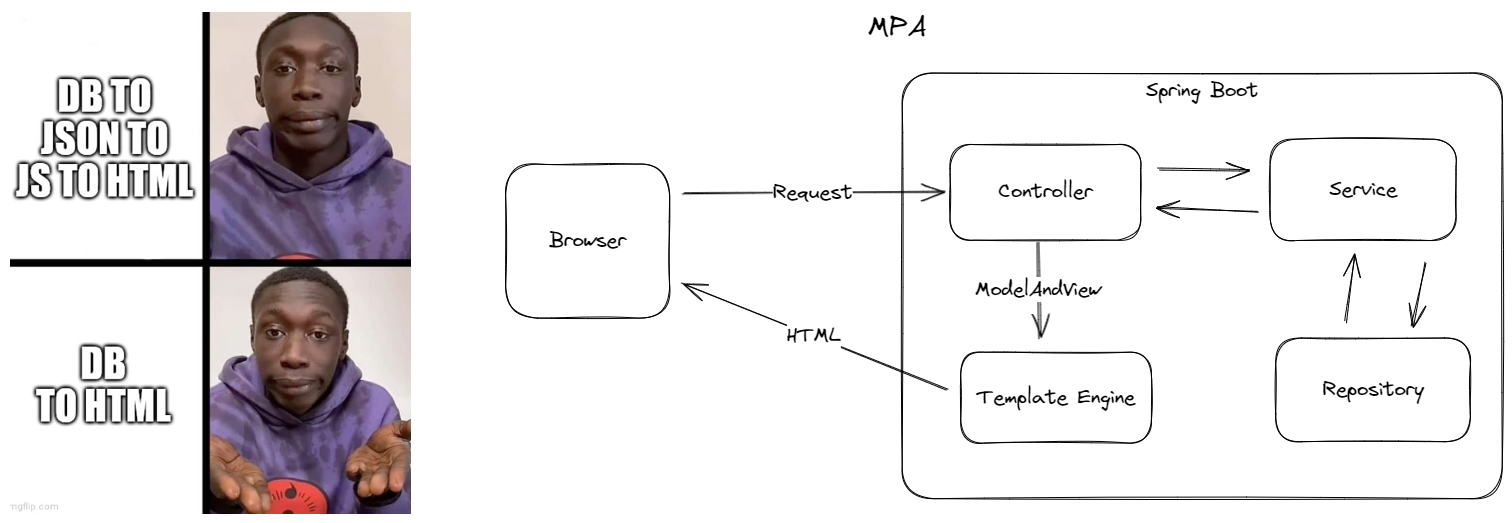
We can render data directly into a HTML template on the server with an engine like JTE. We then return HTML to the browser directly.
But we lost the interactivity of the JavaScript framework. We can return it by leveraging Hypermedia.
Hypermedia Driven Applications
The core of a hypermedia driven application is hypertext. HTML defines how the application looks and how the user can interact with the application based on the current state of the application.
The underlying principle is "Hypermedia as Engine of Application State".
A simple example is an embedded form that returns a success message on successful submission:
We want a great user experience with our server-side rendered web application.
htmx
The htmx library enables modern UX that is comparable to a single page application.
htmx completes HTML as a hypertext and brings it to the 21st century.
The harsh reality is that HTML never got to the point that it could, by itself, offer UX approaching the thick client. Pure server-side rendered HTML offered only a simple & clunky Click → Request → Page Render model. For reasons I can’t completely understand, HTML never moved beyond this extremely basic UX model.
htmx enables interactivity by swapping parts of the DOM without reloading the page. It embeds hx attributes (application control information) in the HTML.
If you want to get an introduction to HTMX + Spring Boot:
Interactive web applications with htmx and Spring Boot
UI Components
Spring Boot is an awesome framework for building applications.
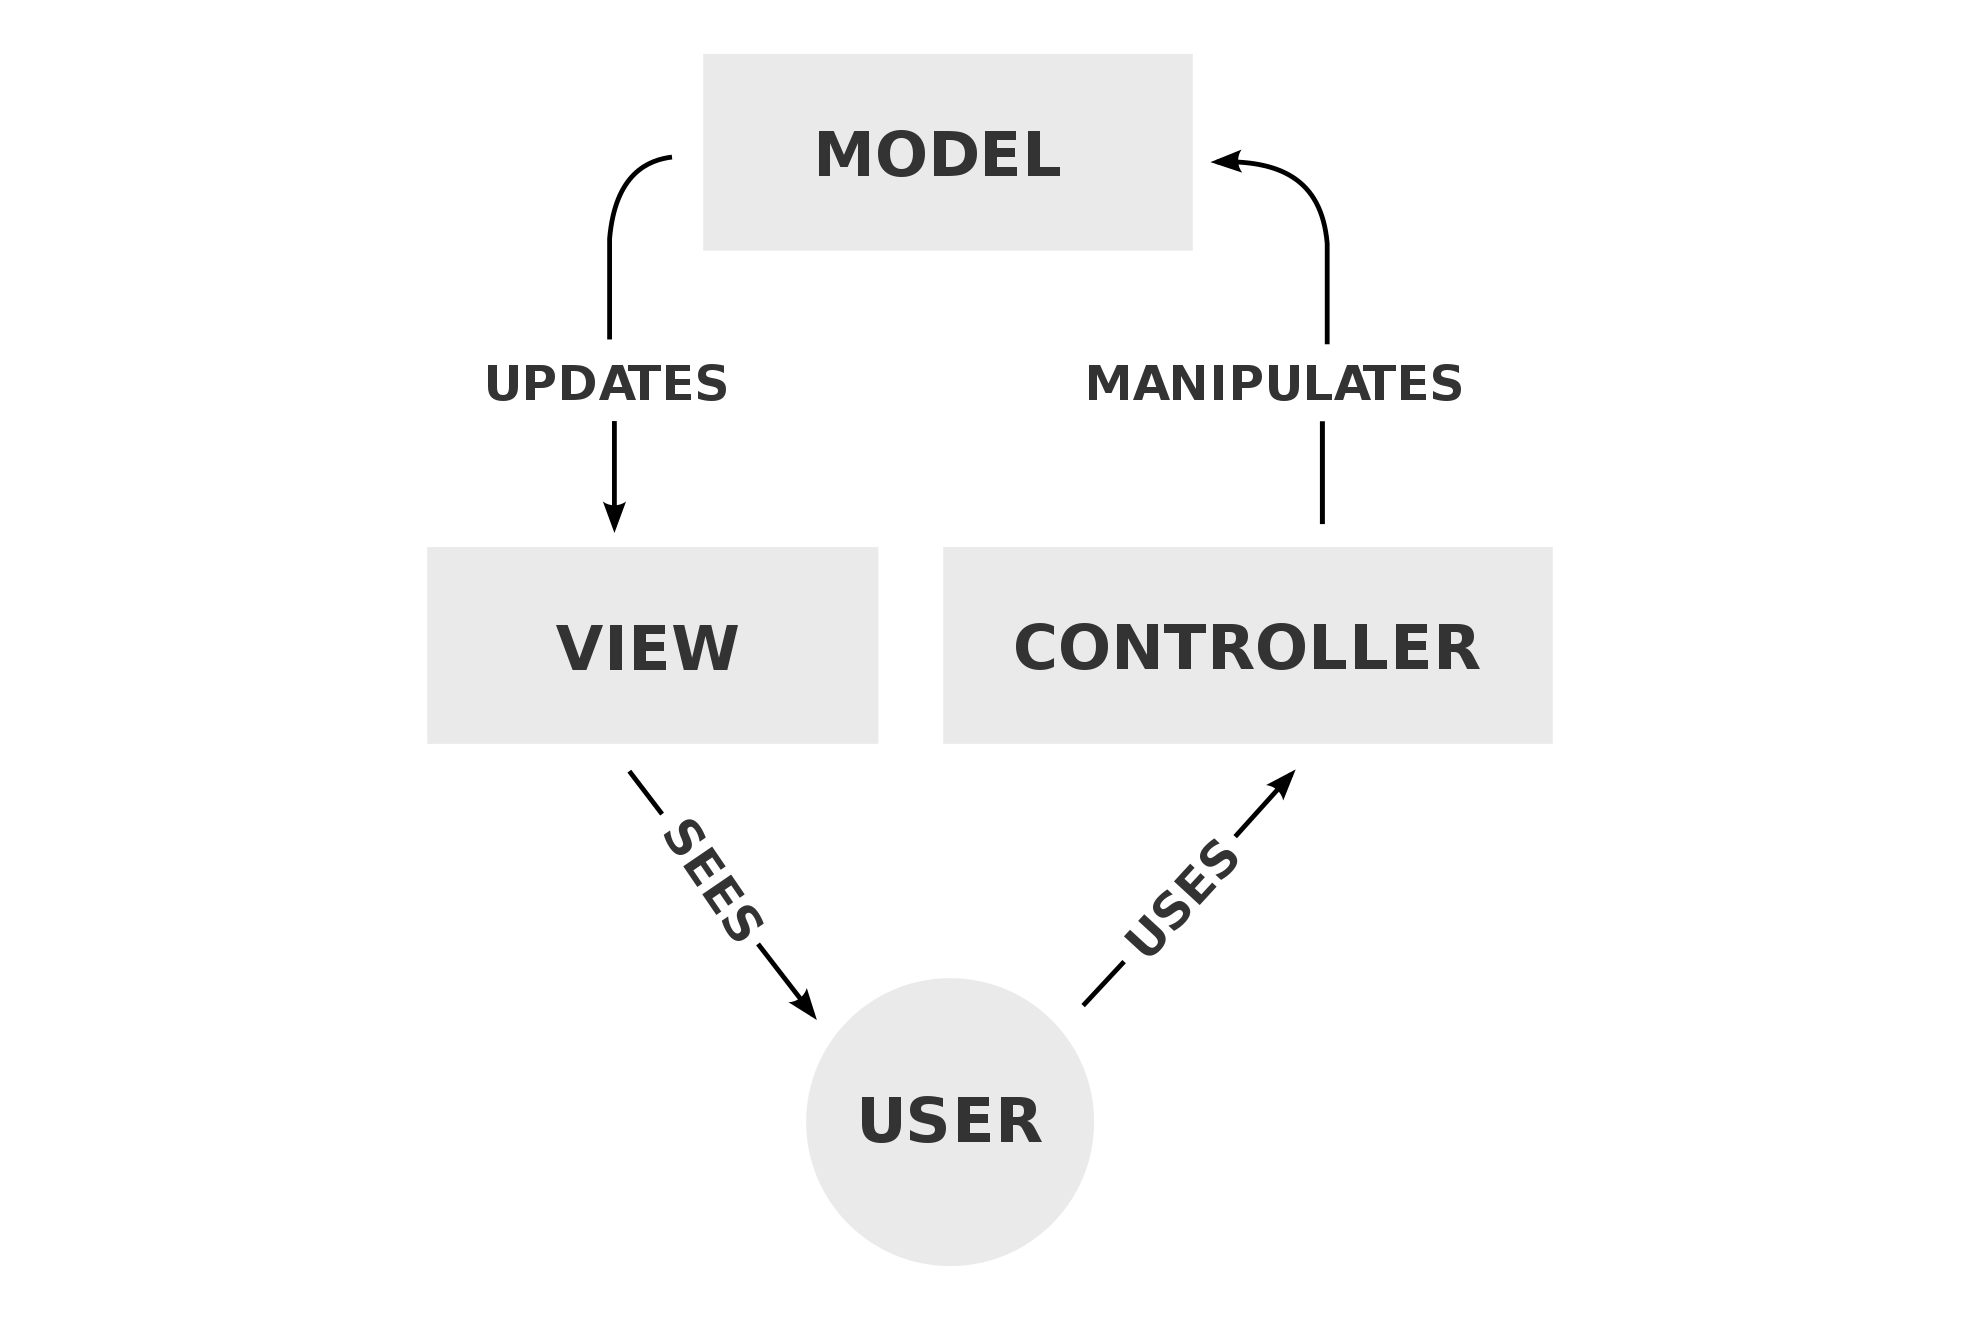
However, the traditional Spring MVC style lacks cohesion between the View (Templates) and the Model (Data).
The JavaScript frontend frameworks like React, Angular and Vue share one trait.
They build user interfaces with components. Components enable reusability and define a clear API.
In the Ruby and PHP communities, server-rendered UI components established themselves with Laravel Livewire and Rails ViewComponent
The main benefit is single responsibility:
ViewComponents consolidate the logic needed for a template into a single class, resulting in a cohesive object that is easy to understand
With the open-source Spring ViewComponent library Spring Developers can enjoy the benefits of UI components.
Introducing Spring ViewComponent
A ViewComponent is a Spring managed bean. We can leverage backend patterns for UI composition.
We create a ViewComponent by annotating a class with the @ViewComponent annotation.
A ViewComponent class defines a rendering context for a corresponding template, this context is called ViewContext. We define a public nested record that implements the ViewContext interface.
SimpleViewComponent.java
@ViewComponent
public class SimpleViewComponent {
    public record SimpleViewContext(String helloWorld) implements ViewContext {
    }

    public SimpleView render() {
        return new SimpleView("Hello World");
    }
}
A ViewComponent needs to have a template with the same name defined in the same package.
In the template, we can access the fields of the ViewContext record.
SimpleViewComponent.jte
@param SimpleViewContext simpleViewContext
<p>
${simpleViewContext.helloWorld()}
</p>
To render the ViewComponent we inject it in the Controller and then call the render method in the endpoint mapping and return the ViewContext result:
@Controller
public class SimpleController {

  private final SimpleViewComponent simpleViewComponent;

  public TestController(SimpleViewComponent simpleViewComponent) {
    this.simpleViewComponent = simpleViewComponent;
  }

  @GetMapping("/")
  ViewContext simple() {
    return simpleViewComponent.render();
  }
}
Perfect fit for HATEOAS
Spring ViewComponent is a perfect fit for building hypermedia-driven web applications.
When the user interacts with the application the state of the application on the server changes.
We now need to send HTML back to swap it into the DOM to reflect the changes in the UI.
With server-side rendered ViewComponents we can call the render method of a ViewComponent again and swap out that component.
Example Application
To explain the benefits I will show you a simple user management application, where we can edit and create users.
If you want to build along, a more detailed guide can be found in my workshop:
Building server-side web applications with htmx
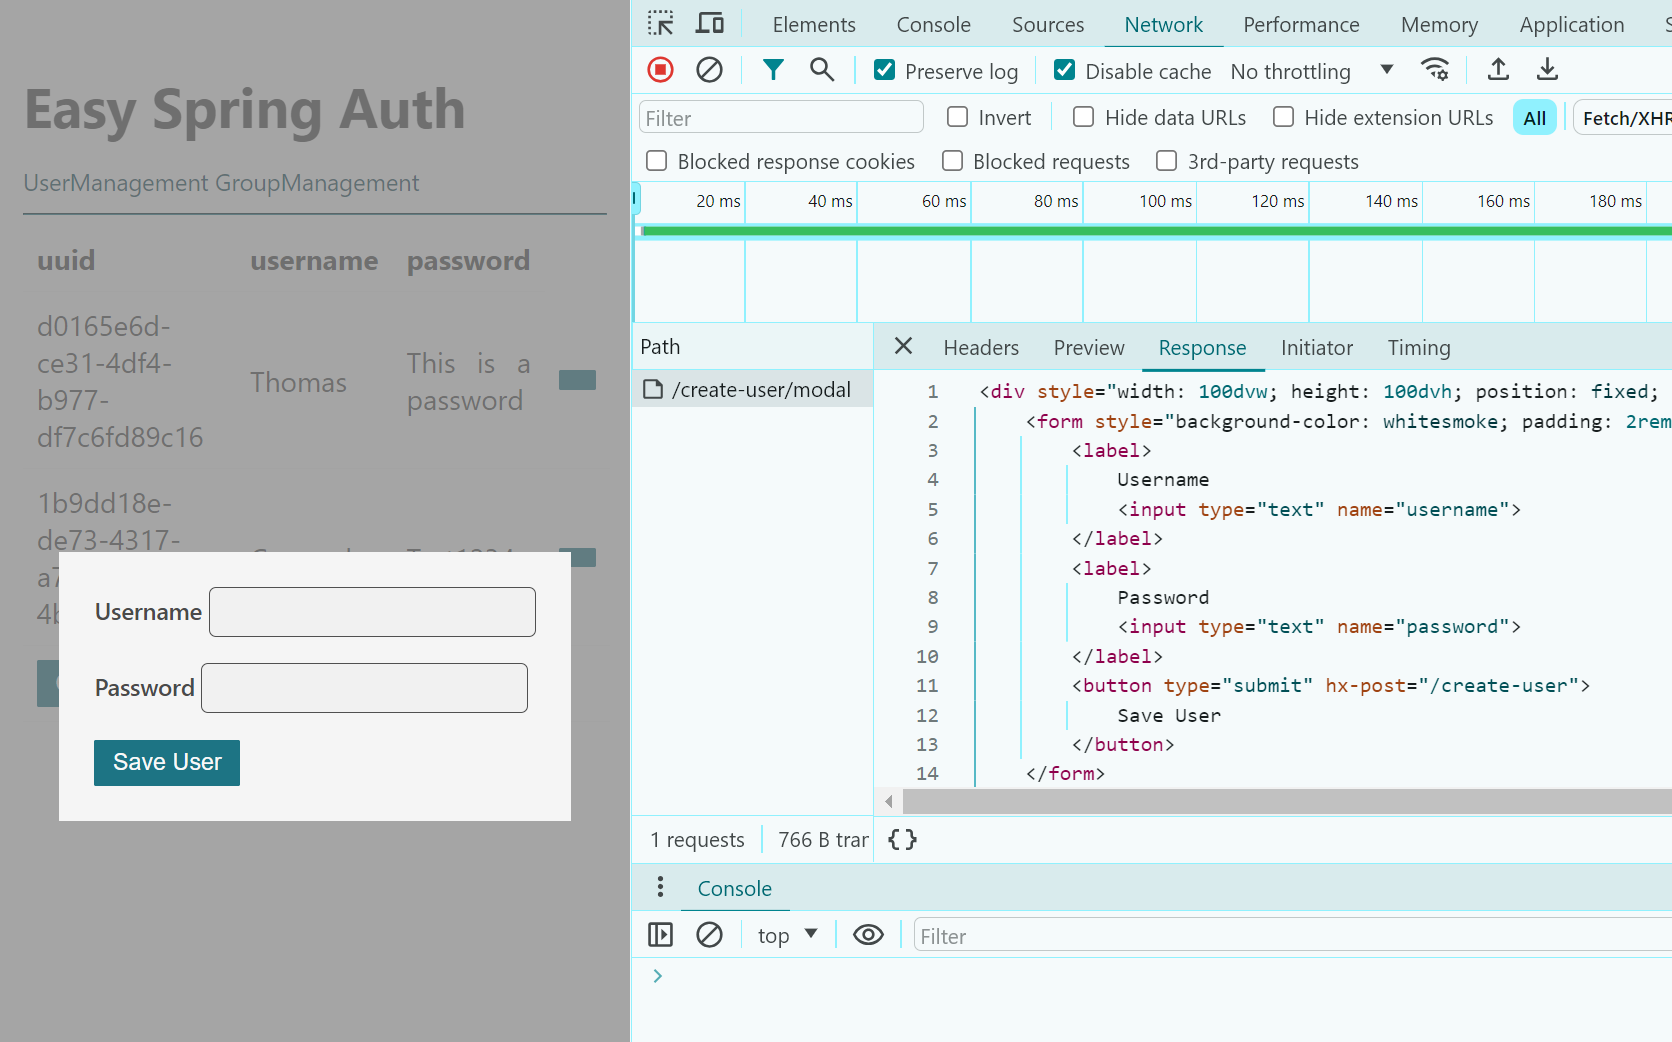
You can play around with the application at htmx.tschuehly.de. Open the DevTools and look at what requests are happening when you interact with the application!

When we want to create/edit a user a modal pops up. The modal is closed when we save the user.
A new table row is automatically appended to the top of the table when we save a new user. When we edit and save an existing user the table row is updated.
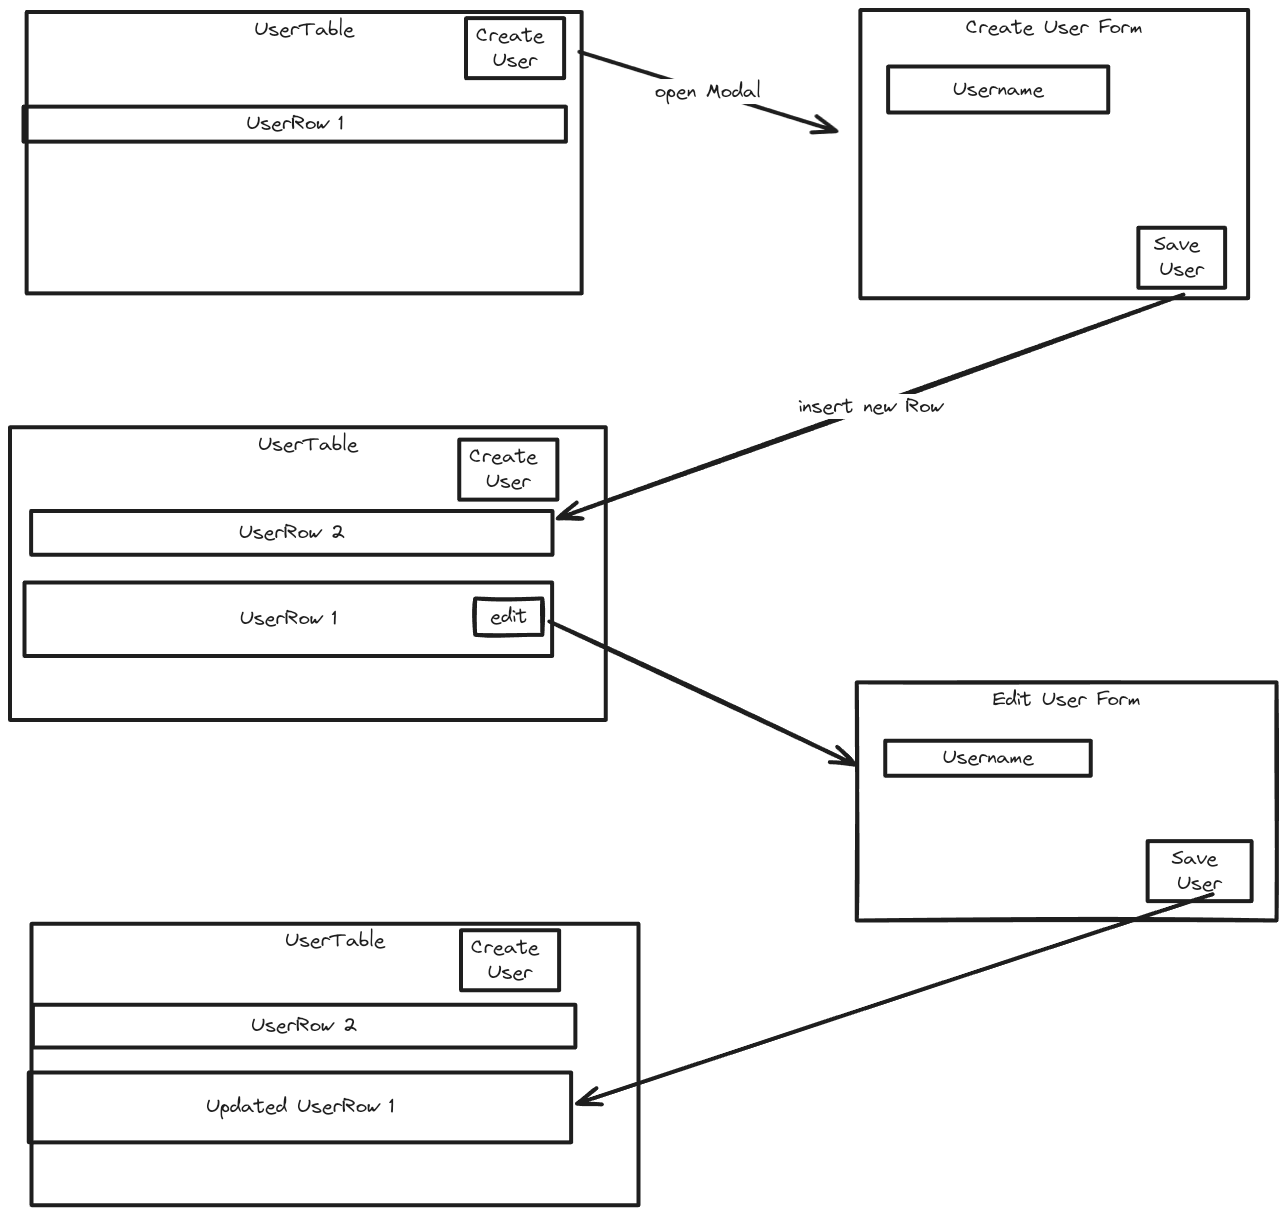
This is where Spring ViewComponent comes in. Each part of the UI is a ViewComponent.
We have a UserTableComponent, a UserRowComponent, an EditUserFormComponent and a CreateUserFormComponent.
When we click on the Create new User button htmx will create an HTTP GET request to the /create-user/modal endpoint.
<!-- UserTableComponent.jte -->
<button hx-get="${GET_CREATE_USER_MODAL}"
        hx-target="#${MODAL_CONTAINER_ID}">
  Create new User
</button>
This will return the HTML of the CreateUserFormComponent that will be rendered in the element with the id: MODAL_CONTAINER_ID
// UserController.java
public static final String GET_CREATE_USER_MODAL = "/create-user/modal";
@GetMapping(GET_CREATE_USER_MODAL)
public ViewContext getCreateUserModal() {
  return createUserComponent.render();
}
When we click on Save User an HTTP POST request is created to the /create-user endpoint.
// UserController.java
public static final String POST_CREATE_USER = "/create-user";
@PostMapping(POST_CREATE_USER)
public ViewContext createUser(String username, String password) {
  EasyUser user = userService.createUser(username, password);
  return userRowComponent.renderNewRow(user);
}
This will first create a new user. Then it will call the UserRowComponent.renderUserRow with the updated user.
// UserRowComponent.java
public ViewContext renderNewRow(EasyUser user) {
  HtmxUtil.retargetId(UserTableComponent.USER_TABLE_BODY_ID);
  HtmxUtil.reswap(HxSwapType.AFTER_BEGIN);
  HtmxUtil.trigger(UserManagementComponent.CLOSE_MODAL_EVENT);
  return new UserRowContext(user);
}
Normally with htmx you define the target, swap and trigger behaviour with hx-attributes. I prefer defining them with HX- reponse headers in the component method. This decouples the source template from the target component.
Here we tell htmx to target the UserTableComponent body, insert the response before the first child and then trigger the CLOSE_MODAL_EVENT
<!-- UserRowComponent.jte -->
!{var uuid = userRowContext.easyUser().uuid;}
<tr id="${UserRowContext.htmlUserId(uuid)}">
    <td>
        ${uuid.toString()}
    </td>
    <td>
        ${userRowContext.easyUser().username}
    </td>
    <td>
        ${userRowContext.easyUser().password}
    </td>
    <td>
        <button hx-get="${URI(UserController.GET_EDIT_USER_MODAL,uuid)}"
                hx-target="#${MODAL_CONTAINER_ID}">
            <img src="/edit.svg">
        </button>
    </td>
</tr>
The UserRowComponent.jte has an edit button that calls the GET_EDIT_USER_MODAL endpoint with the uuid of the user as parameter.
After editing a user we need to swap the row of the user we just changed. We can create a rerender method and call it from the corresponding endpoint.
// UserRowComponent.java
public ViewContext rerender(EasyUser easyUser) {
  String target = HtmxUtil.target(UserRowContext.htmlUserId(easyUser.uuid));
  HtmxUtil.retarget(target);
  HtmxUtil.reswap(HxSwapType.OUTER_HTML);
  HtmxUtil.trigger(UserManagementComponent.CLOSE_MODAL_EVENT);
  return new UserRowContext(easyUser);
}
Advanced Patterns
With Spring ViewComponent we can leverage Dependency Injection to compose the UI while adhering to the open–closed principle.
Another interesting topic is declarative UI with the Strategy Pattern. I have an example repository here: github.com/tschuehly/svc-ui
Lastly we can create higher level abstractions on top of the simple concept of swapping Elements in the DOM that are specific to our domain and use cases.
I will create more blog posts in the future showing the patterns we use at alanda.io to create an enterprise application with Spring ViewComponent and htmx.
If you want to learn more about HTMX + Spring Boot check out my series Web development without the JavaScript headache with Spring + HTMX.
My side business PhotoQuest is also built with HTMX + JTE
Web development without the JavaScript headache with Spring + HTMX
Create web applications with Spring Boot, JTE, and htmx without dragging in a frontend framework.